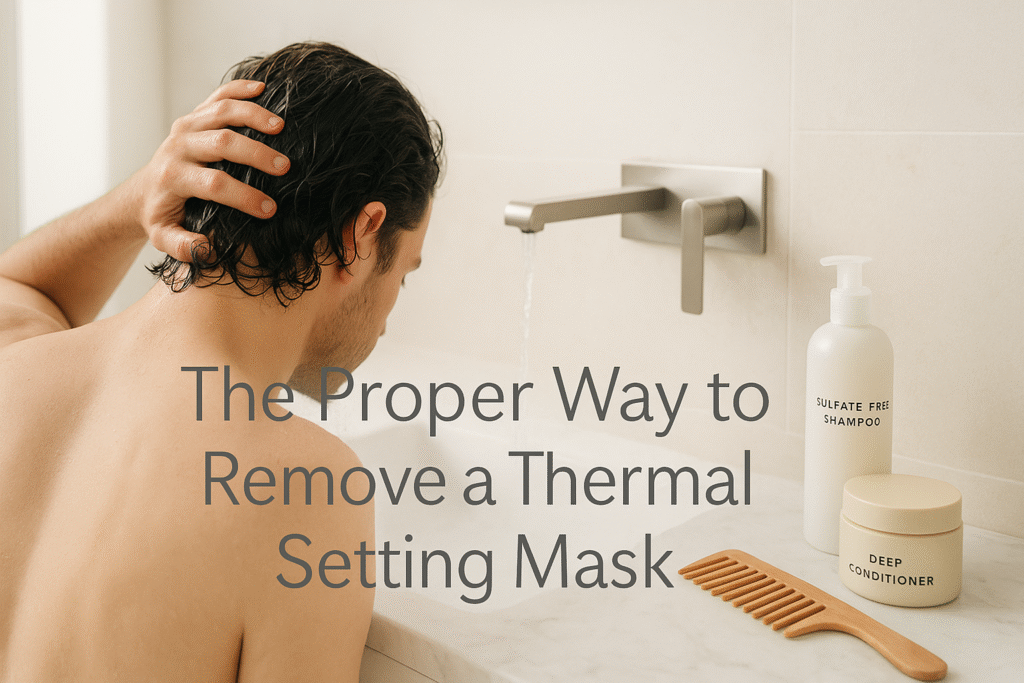
There’s nothing quite like the feeling of a fresh, clean face after a good mask treatment. We all love that glowing, pampered sensation! Thermal setting masks, also known as plaster or gypsum masks, are a fantastic way to give your skin a deep treatment. They work by gently warming up, helping your skin absorb all the good ingredients underneath, and then hardening to create a firm cast. This process can boost circulation, purify pores, and leave your skin feeling incredibly soft and smooth.
However, the magic of these masks isn’t just in putting them on; it’s also in taking them off. If you don’t remove a thermal setting mask correctly, you could end up irritating your skin, pulling out fine hairs, or even leaving behind residue that blocks your pores. That’s why I’m here to guide you through the proper way to remove a thermal setting mask, ensuring you get all the benefits without any of the drawbacks. Let’s dive in and learn how to unveil your best skin!
Key Takeaways
- Preparation is Essential: Always make sure your mask is fully set and use a barrier cream on sensitive areas like eyebrows and hairline before applying the mask.
- Gentle Does It: The key to proper removal is to be gentle. Never pull or rip the mask off quickly, as this can irritate your skin.
- Peel from Edges: Start by gently lifting the edges of the mask, working slowly and steadily either upwards or inwards toward the center of your face.
- Cleanse and Soothe: After removing the mask, always cleanse your face to remove any small bits of residue, then follow up with a toner and a good moisturizer to calm and hydrate your skin.
- Listen to Your Skin: Pay attention to how your skin feels during and after removal. If you experience discomfort, adjust your technique or consider seeking professional advice.
What Exactly is a Thermal Setting Mask?
Before we talk about removing them, let’s quickly understand what these masks are. A thermal setting mask is usually a powder that you mix with water to create a thick paste. Once applied to your face, it undergoes a chemical reaction that causes it to heat up slightly (hence “thermal”) and then harden into a firm, plaster-like cast. This warmth helps open up your pores, allowing any serums or treatments applied underneath to soak in better. The firming action also provides a temporary lifting effect and helps to detoxify the skin. Think of it as a cozy, warm blanket for your face that then becomes a gentle, firm hug.
Why Proper Removal Matters So Much
You might think, “It’s just a mask, how hard can it be to take off?” But with thermal setting masks, proper removal is crucial for several reasons:
- Skin Health: Rough removal can tug at your skin, causing redness, irritation, or even breaking delicate capillaries. This is especially true for sensitive skin types.
- Preventing Breakouts: If small pieces of the mask are left behind, they can clog your pores, leading to unwanted breakouts.
- Comfort: A gentle removal process is much more comfortable than a painful, harsh one. You want to enjoy the whole masking experience, not dread the end!
- Hair Preservation: These masks can sometimes stick to fine facial hairs or eyebrows. Proper technique prevents painful pulling and potential hair loss in those areas.
“The magic of a thermal setting mask isn’t just in its application; it’s in its respectful and gentle removal, ensuring your skin reaps all the benefits without any irritation.”
Gather Your Tools: What You’ll Need
Before you begin, make sure you have everything ready. This will make the removal process smoother and less stressful. Here’s a quick checklist:
- A clean, soft towel: To pat your face dry.
- Warm water: For rinsing.
- A gentle cleanser: To wash off any residue.
- A mild toner: To balance your skin’s pH.
- Your favorite moisturizer or serum: To hydrate and nourish.
- Barrier cream (optional but recommended): Petroleum jelly or a thick balm for protecting sensitive areas.
- A magnifying mirror (optional): To check for any leftover bits.
Step-by-Step Guide: What Is the Proper Way to Remove a Thermal Setting Mask
Alright, let’s get down to business! Here’s my detailed guide on how to properly remove your thermal setting mask.
Step 1: Prepare Your Skin and Mask
Before you even think about peeling, ensure your mask is fully set. This usually takes about 15-20 minutes, depending on the product. The mask should feel firm and cool to the touch, no longer warm or pliable.
- Check for Full Setting: Gently tap on the mask. It should feel hard, like a cast. If it still feels soft or sticky in places, give it a few more minutes. Patience is a virtue here!
- Pre-application Barrier: I always recommend applying a barrier cream to your eyebrows, hairline, and any other areas where you don’t want the mask to stick too much. This makes removal much easier and prevents pulling on delicate hairs. This small step can save you a lot of discomfort!
Step 2: The Gentle Lift – Starting the Removal
This is where the real work begins, but remember, “gentle” is our watchword!
- Loosen the Edges: Start by gently wiggling your facial muscles underneath the mask. Make some small “O” shapes with your mouth, raise your eyebrows, and try to smile. These tiny movements can help create small gaps between the mask and your skin.
- Find a Starting Point: Carefully look for an edge that seems a little looser or easier to lift. Often, this is around the jawline or near the ears.
- Use Your Fingertips: With clean fingertips, very gently try to lift a small corner of the mask. Don’t dig your nails in, as this could scratch your skin. The goal is to get just enough of a grip to start the peeling process.
Step 3: Peeling Away – The Main Event
Once you have a small edge lifted, the process of peeling the mask off can begin.
- Slow and Steady: This is not a race! Pull the mask slowly and steadily. Think of it like peeling a sticker off a delicate surface.
- Direction Matters: I find it works best to peel the mask either upwards (from your jawline towards your forehead) or outwards (from the center of your face towards your ears). This often goes against the direction of fine facial hair, minimizing pull.
- Support Your Skin: As you peel, use your other hand to gently support the skin underneath. This helps prevent unnecessary tugging and keeps your skin firm as the mask lifts.
- Take Breaks if Needed: If you encounter a stubborn spot or feel any pain, stop. Don’t force it. Try to gently loosen that area again with a slight facial movement or by applying a tiny bit of warm, damp cloth to the edge (though this can sometimes make the mask break).
- Keep it in One Piece (Ideally): While not always possible, try to remove the mask in as few pieces as possible. This makes cleanup easier.
“Patience is your best friend when removing a thermal setting mask. Rush it, and your skin will let you know!”
Step 4: The Final Cleanse
Even if you’ve removed the mask in one perfect piece, there might be tiny bits of residue left behind. This step is crucial for preventing clogged pores.
- Warm Water Rinse: Splash your face with lukewarm water. Avoid hot water, as your skin might be a little sensitive after the mask.
- Gentle Cleanser: Apply a small amount of your favorite gentle facial cleanser. Massage it into your skin in circular motions, paying extra attention to areas where mask residue might linger (like around the nose, hairline, and jawline).
- Thorough Rinse: Rinse your face thoroughly until all traces of cleanser and mask residue are gone.
- Pat Dry: Gently pat your face dry with a clean, soft towel. Avoid rubbing, which can irritate your freshly treated skin.
Step 5: Soothing Aftercare
Your skin has just undergone a deep treatment, and now it needs some love! This aftercare step locks in the benefits and calms your skin.
- Tone: Apply a mild, alcohol-free toner to your face. This helps to rebalance your skin’s pH and prepares it for the next steps. It’s like resetting your skin after a workout.
- Serum (Optional): If you use a targeted serum (like a hyaluronic acid serum for hydration or a vitamin C serum for brightness), now is a great time to apply it. Your pores are open and ready to absorb all the goodness!
- Moisturize: Finish with a generous application of your favorite moisturizer. This will hydrate your skin, lock in moisture, and create a protective barrier. Choose a moisturizer suited to your skin type. For those concerned about overall skin and hair health, remember that proper hydration is key, much like understanding how to prevent balding effectively or finding solutions for healthier, fuller hair.
Common Mistakes to Avoid
To ensure a perfect mask removal experience, steer clear of these common errors:
- Pulling Too Hard or Fast: This is the number one mistake! It can cause pain, redness, and irritation. Always be gentle.
- Not Waiting for the Mask to Fully Set: If the mask isn’t completely hardened, it will be sticky and messy to remove, often breaking into many small pieces.
- Forgetting Barrier Cream: Neglecting this step can lead to the mask sticking to your eyebrows or hairline, making removal painful.
- Skipping Aftercare: Not cleansing or moisturizing properly can leave your skin vulnerable to dryness or breakouts.
- Using Hot Water: Hot water can strip your skin of its natural oils and cause further irritation, especially after a deep mask treatment. Lukewarm is always best!
- Ignoring Skin Discomfort: If you feel significant pain or burning during removal, stop immediately. Your skin might be too sensitive for the mask, or you might be reacting to an ingredient.
Tips for a Smooth Mask Removal Experience
Here are a few extra tips I’ve picked up over the years to make your thermal mask removal even better:
Relaxation is Key: Make the entire masking experience, including removal, a relaxing ritual. Put on some calming music, light a candle, and breathe deeply. This isn’t just about skincare; it’s about self-care. It’s similar to how visiting a barbershop is more than just a haircut – it’s an experience!
Use a Steamer (Before Application): If you have a facial steamer, using it for a few minutes before applying the mask can help open your pores even further, making the mask more effective and potentially easier to remove.
Consider Your Skin Type: If you have very sensitive skin, do a patch test first. Also, choose masks specifically designed for sensitive skin. Understanding your skin’s needs is as important as choosing the right hair treatment, like deciding between permanent vs. temporary hair straightening.
Proper Lighting: Make sure you have good lighting when removing the mask so you can clearly see any tiny bits of residue you might need to wash off.
Regular Skincare Routine: Remember, a mask is a booster, not a replacement for a consistent daily skincare routine. Regular cleansing, toning, and moisturizing are vital for healthy skin. And if you’re experiencing issues like dandruff, understanding its symptoms, causes, and treatments is crucial for overall scalp and skin health.
When to Seek Professional Help
Sometimes, even with all the best intentions and techniques, you might feel unsure, or your skin might react unexpectedly. This is when a professional can be invaluable.
If you’re new to thermal masks, have very sensitive skin, or are dealing with specific skin concerns, getting a professional facial that includes a thermal mask can be a great idea. Estheticians are trained to apply and remove these masks perfectly, ensuring maximum benefits and minimal irritation. They can also recommend the best products for your skin type.
Finding a skilled professional for your grooming needs, whether it’s for a facial or a haircut, makes a huge difference. For instance, knowing why every man needs a great barber or understanding the benefits of visiting a men’s salon highlights the value of expert care. If you’re in the Karachi area, you might even consider visiting the best salon in Gulistan-e-Johar or looking for the best barber in Karachi for top-notch services, including advanced skincare treatments.
Final Thoughts
Removing a thermal setting mask might seem like a small part of your skincare routine, but it’s incredibly important for getting the best results and keeping your skin happy and healthy. By following these steps, being patient, gentle, and thorough, you’ll ensure that every masking session ends with radiant, refreshed skin, not redness or irritation.
Remember, skincare is a journey, and understanding each step, from application to removal and aftercare, is key to achieving that glowing complexion we all desire. So go ahead, enjoy your thermal mask, confidently unmask your beautiful skin, and if you’re looking for expert care with the same attention to detail, The Barber’s Cafe is always here to help you look and feel your best.